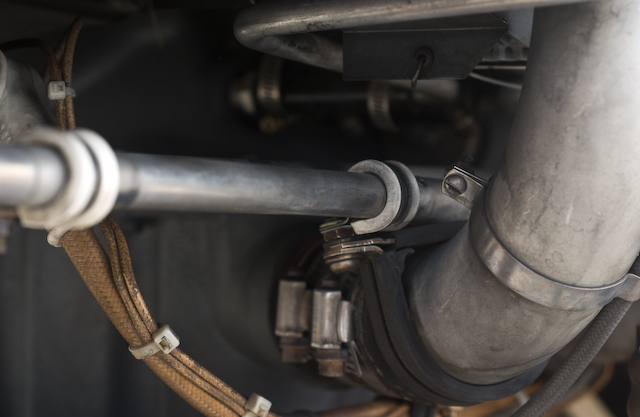
This is the cold air carburetor air duct. On the inside of the sheet metal (difficult to photograph) a hose clamp holds the flexible orange hose onto the duct. Examine the hose clamp and even give it a little wiggle to make sure that it is firmly attached. Don't yank on it so hard that you bend the metal wire inside the orange hose, or risk pulling the hose out of the hose clamp, but you can make sure that it is attached firmly.
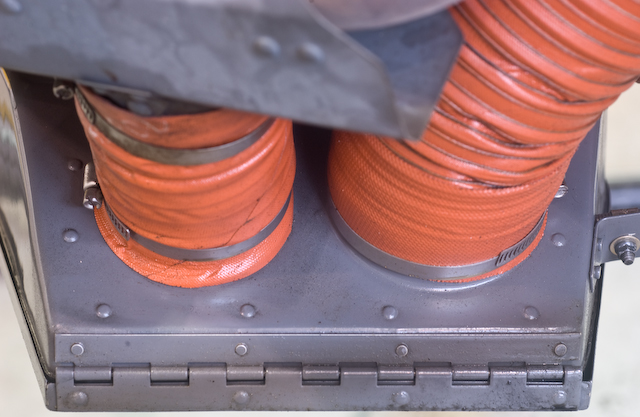
The orange hose has a wire in it to maintain it's shape. If the internal wire corrodes it can eventually break and allow the hose to collapse. Examine the entire hose and make sure that it has a good cylindrical shape throughout the entire length of the hose. If it looks irregular, have a mechanic check it out. This goes for all the similar hoses leading to the carburetor air box.
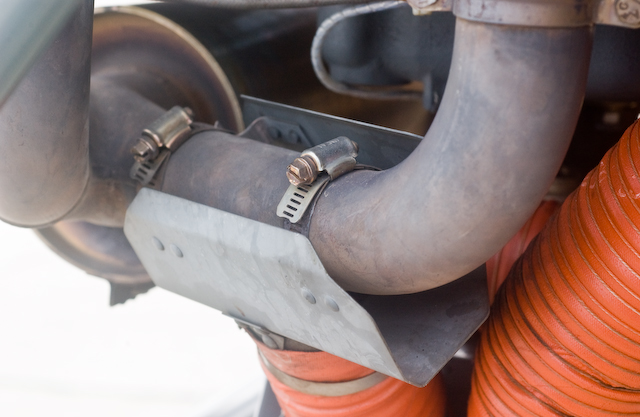
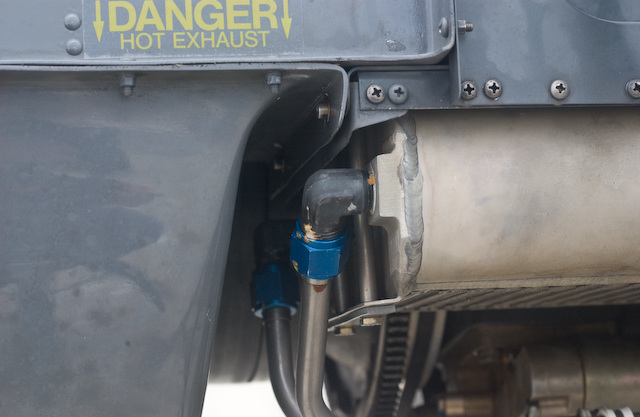
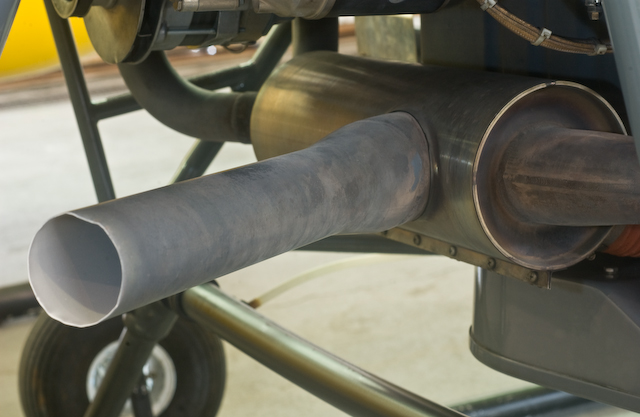
This is a picture of the carburetor hot air scoop on a Beta II. This is a much better design than on the O320 R22s in my opinion. It is easier to inspect, and is not in close proximity to any oil lines. You can easily see and inspect the host clamps that attach it to the exhaust system.
On the earlier R22 models, the carburetor heat scoop goes very close to an oil line. If a mechanic reinstalls it rotated slightly, it will cut through the oil line. This actually happened to me, but a student caught it during preflight - there was a puddle of oil under the helicopter. Coincidentally, Robinson published a notice the following week warning about that exact situation. Not in time to prevent problems for that aircraft, but indicative that it was a fairly common problem. This also points out the effectiveness of watching for puddles of fluid under an aircraft - I've seen several problems that might have been missed on preflight -- cut oil lines, cracked blade boots, etc. discovered because of the puddle of fluid under the part in question.

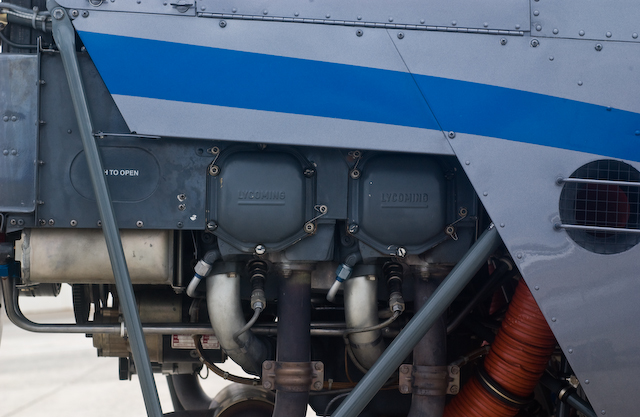
All around the engine there is sheet metal designed to conduct cooling air around the engine, especially the cylinder heads. This sheet metal has always been a bit of a weak part in the R22 design: it is not uncommon to find cracks which must be stop drilled. The part to look for is not the metal with "Lycoming" stamped on it - it's the metal between those two valve covers. That metal extends all around the engine, and you want to give it a good look over with a flashlight to see in the dark corners on a frequent basis because there will eventually be some cracks!
While not a significant threat to safety, if the cracks should propagate until a part of the sheet metal falls off, the engine will not receive sufficient cooling and you'll risk a hot cylinder that might eventually manifest itself as engine difficulties.
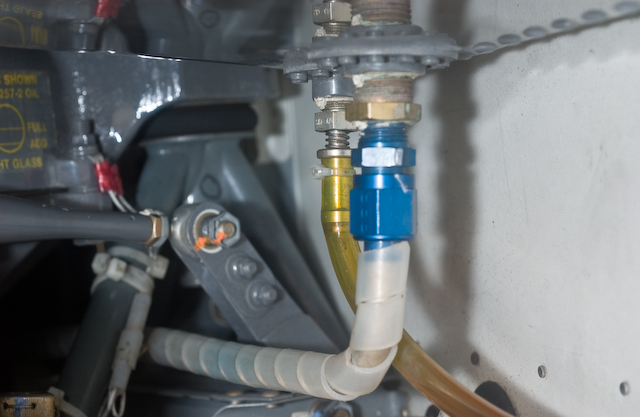
There are two fittings visible in the picture. The one with the yellow tube on it is the fuel drain. The one with the blue fitting is the cross feed that connects the right and left fuel tanks together. Check that there is no fuel leaking from either fitting, and no fuel is dripping from the bottom of the tank.
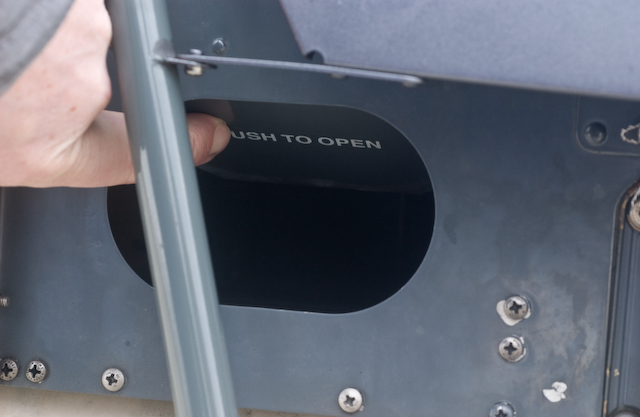
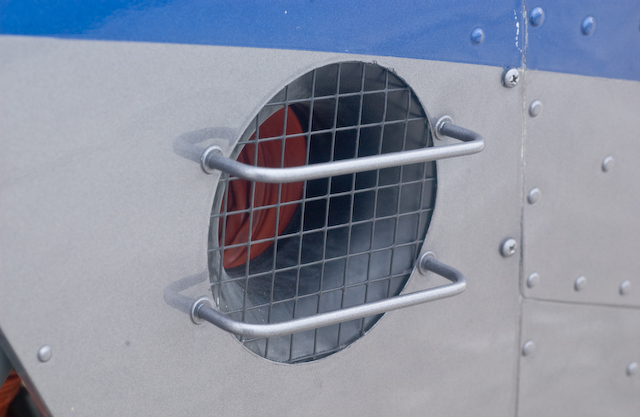
Open the oil cooler door (which is spring loaded) and check for debris. Here in New England we get lots of leaves sucked into the oil cooler when they fall off the trees in autumn. Also, when the grass has been cut we tend to suck a fair amount of that into the oil cooler. A few strands of grass isn't going to effect the efficiency much, but a big leaf will. Just reach in and pull out any stuff you find on top of the oil cooler.
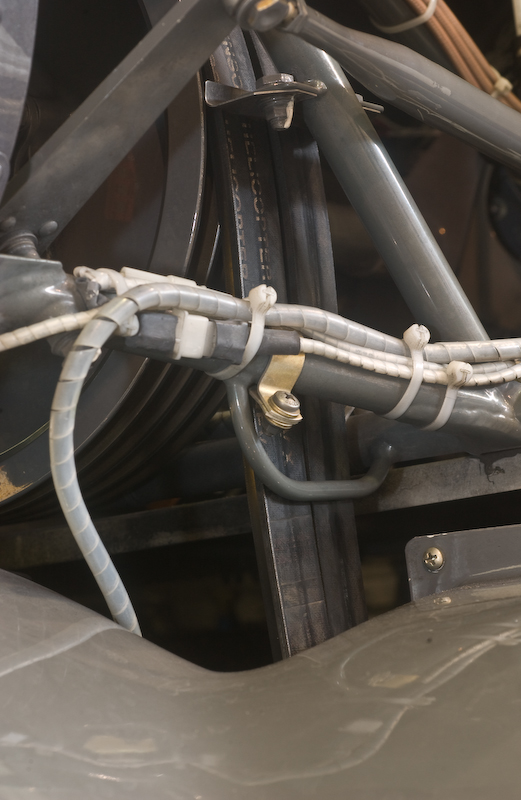
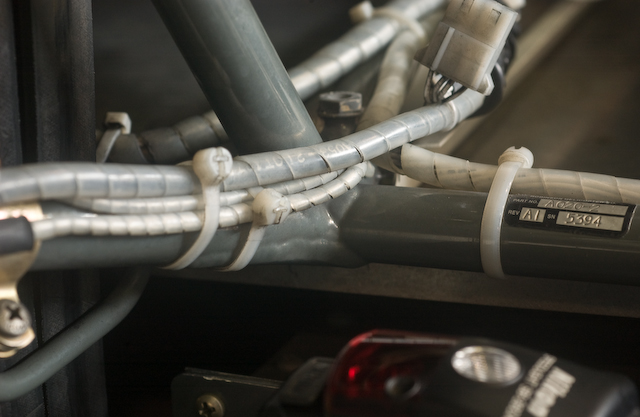
The two blue fittings coming out of the oil cooler are the oil lines. They travel up the length of the engine:
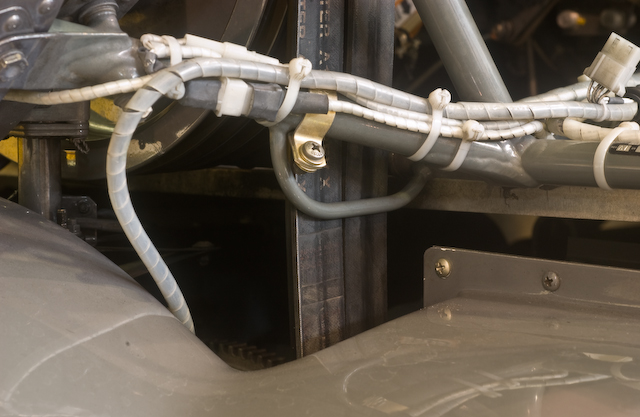
Notice how all the attach points for the oil lines have rubber and plastic composition. This is because any metal touching the oil line will eventually cut through it due to vibration. Make sure that nothing is touching the oil lines without a rubber or plastic protective device.
Grab the exhaust pipe and give it a little shake to make sure that everything is secure. Note that this R22 has the heater muff attached so you should also check that the sheet metal is not cracked, and that all the screws along the bottom are intact.
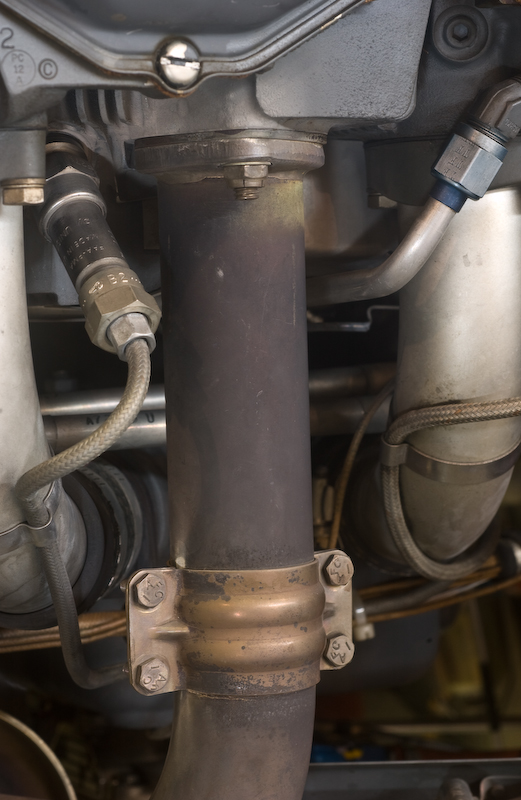
Likewise check that the gaskets are not leaking exhaust gasses. As you can see in this photo, it's common to get a little exhaust leak around the lower bracket where the two halves of the bracket connect. That's nothing to worry about.
Check the condition of the belts. There are a couple of schools of thought on the proper way to do this. One guy I worked with years ago had the belts break, and after that he always religiously turns the belts by hand so that he can inspect every inch.
The downside of this is that you get black belt dust all over your hands, so I just inspect the belts without turning them. If you look at the top and the bottom on both the left and right side of the helicopter, you can probably see about 80% of the belt area, so it's a fairly complete inspection.
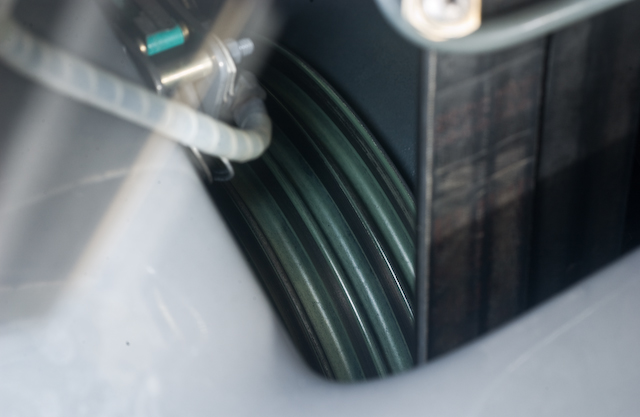
In this picture you can see the outside surface of the V-belt, but not really the inside surface which mates with the upper and lower pulleys. To do a good inspection of the inside of the belt often requires a flashlight, and you won't see nearly as much as the exterior of the belt.
Robinson also recommends that you check the wear on the upper and lower sheave to make sure that the belts are riding correctly on them, and that no foreign objects have fallen in and been caught between the belts and the pulleys.
This is the same check as we did earlier, except that check was on the front side of the upper sheave, and this is on the rear side. Since there is a seal on both front and rear, you need to check both sides.
Check that the bearing is not pushing an unreasonable amount of grease out. If it has just been serviced, it may have some grease, but if you wipe it and you keep getting more it may be an indication of a problem.
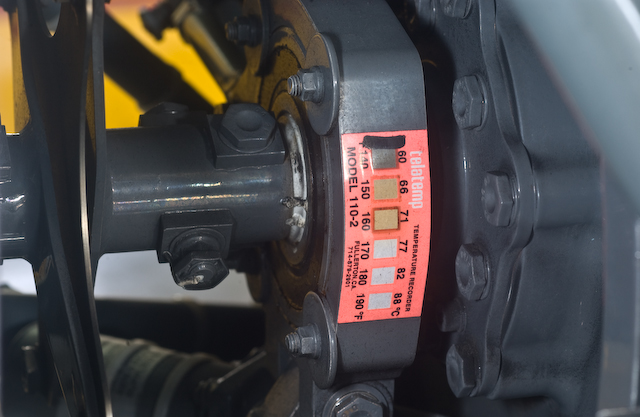
This is a good view of the upper bearing and the associated teletemp. Note that one square is black, and two squares are sort of a yellowish brown. This is not an indication that the part was approaching 160 degrees F, because in that case the 150 square would be dark. Instead, this is probably caused by some contamination of the teletemp material.
Check that the wear marks are uniform, an indication that the belts are all aligned identically. Also check that there are no dents or other blemishes on the pulley that might indicate someething fell in and was crushed between the belts and the pulley.
Look at each place where the frame is welded and check for cracks. In the above picture, you can see that an extra gusset was added to strengthen the weld. Early on, the R22s were experiencing cracks in this area, probably because of the vibration from the tail rotor.
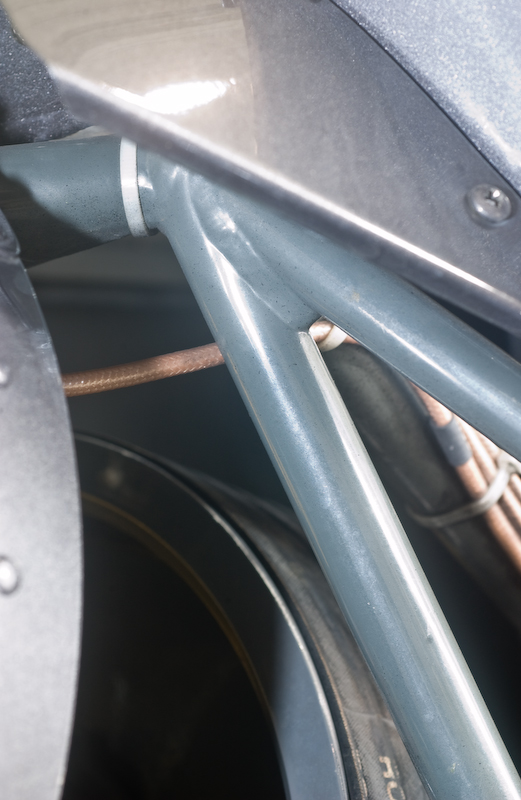
Another example of a weld to check, this one on the upper part of the frame.
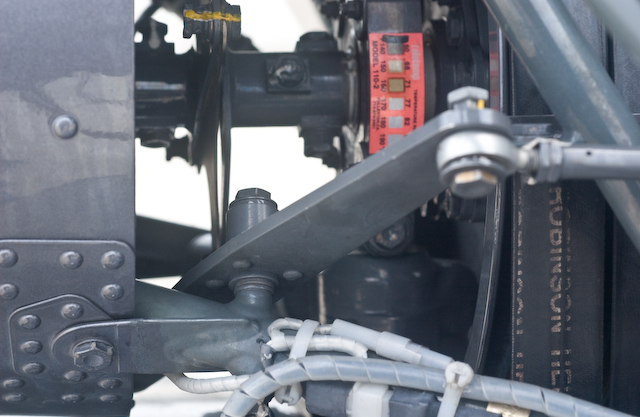
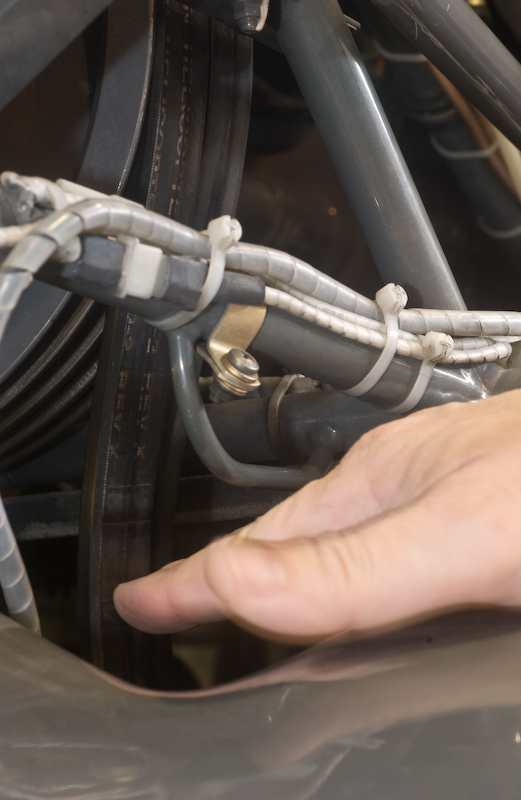
The bell-crank in this picture is part of the tail rotor control push/pull rods. Grab hold of it with your hand and work the control forward and back and make sure that nothing is interfering with the free movement of the tail rotor controls. Notice the rear flex coupling is just above the inner portion of the bell-crank. Many years ago I flew one helicopter that was improperly rigged such that the flex coupling could descend and hit the tail rotor bell-crank when the clutch was in the disengage position. If you held the pedals in just the right position during shutdown in that aircraft you would hear "tick, tick, tick" as the flex coupling was hitting the bolt on the bell-crank!